If your saved nail photos all demand rhinestones and a two-hour appointment, line art nails are the reset. In the salon, this is the design I recommend most for art that survives real life: one fine black line over a nude or milky base, drawn with a liner brush, sealed and done. No charms to catch, and grow-out stays discreet.
What makes the look professional is restraint plus placement. Fine linework lives on negative space, so the base must be flawless and the motif must suit the nail in front of you — a wide, flat ring fingernail carries a face profile beautifully, while a short squoval suits a diagonal or an outlined tip.
Here are 25 line art nails, ordered from most forgiving to most technical, each with its difficulty level and the exact tool that makes it easy. Unlike generic idea lists, these are complete, wearable sets you can copy photo-for-photo at home with polish or gel liner.
Quick Answer: Line art nails are minimalist manicures in fine black lines — faces, stems, swirls, geometric outlines — over a nude, milky or sheer base. You need a 7–9mm liner brush, black gel liner or regular polish, a dotting tool and a glossy top coat. Start with diagonals, dot-and-line and outline hearts; save single-line faces for an accent nail.
Jump to Your Favorite Line Art Nail Design
- Single-Line Face
- Fine-Line French
- Geometric Arcs
- Botanical Stems
- Constellation Lines
- Abstract Eye
- Swirl Lines
- Grid Lines
- Half-Moon Outline
- Wave Lines
- Diagonal Lines
- Single-Line Flower
- Sun and Moon Outline
- Chevron Lines
- Dot-and-Line
- Border Outline
- Abstract Profile
- Outline Heart
- Cross Lines
- Pinstripes
- Contour Lines
- Butterfly Outline
- Horizon Lines
- Abstract Hand
- Mid-Century Lines
1. Single-Line Face
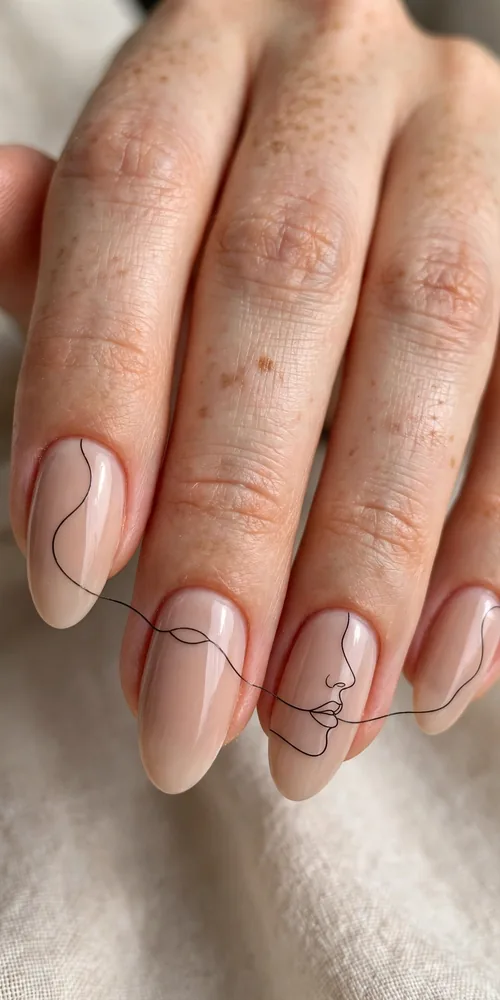
The signature design, requested by screenshot more than any other. One continuous stroke suggests a forehead, closed eye and lips without lifting the liner brush. Keep it to the ring finger — the widest, flattest nail — other nails plain nude. Difficulty: advanced.
2. Fine-Line French
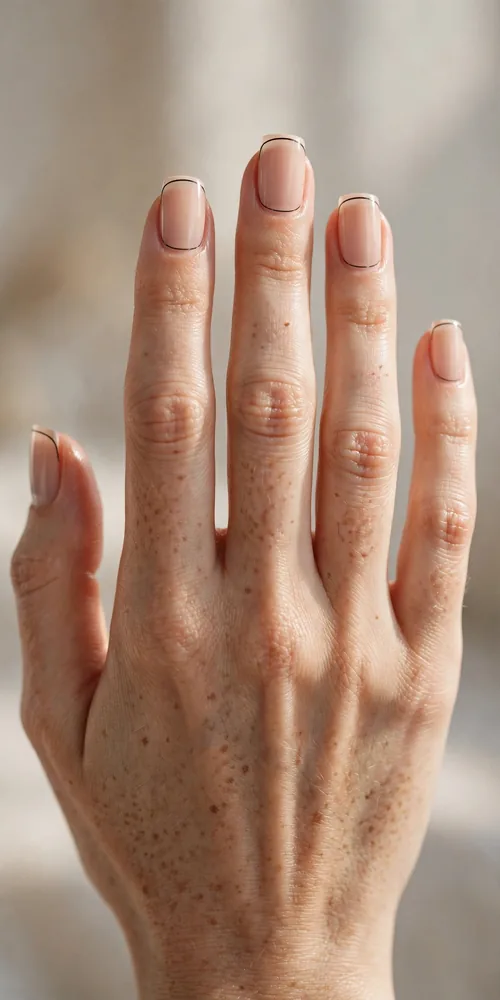
A French manicure reduced to a hairline: trace only the smile line with a long liner brush, pulling sidewall to sidewall in one pass. It suits short square and squoval nails, and grow-out is almost invisible. Difficulty: intermediate.
3. Geometric Arcs
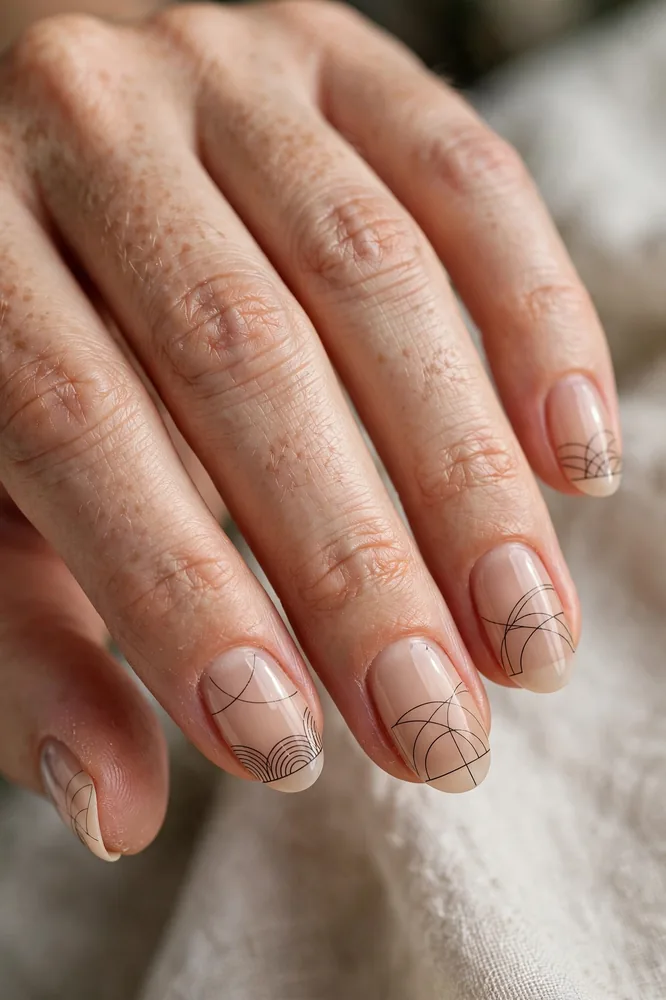
Overlapping quarter-circles and arcs, borrowed from Bauhaus posters. Build arc by arc, rotating the finger — not your wrist — so every curve stays centred. Works best on medium almond or oval nails. Difficulty: intermediate. Keep arcs unfilled; the negative space is the design.
4. Botanical Stems
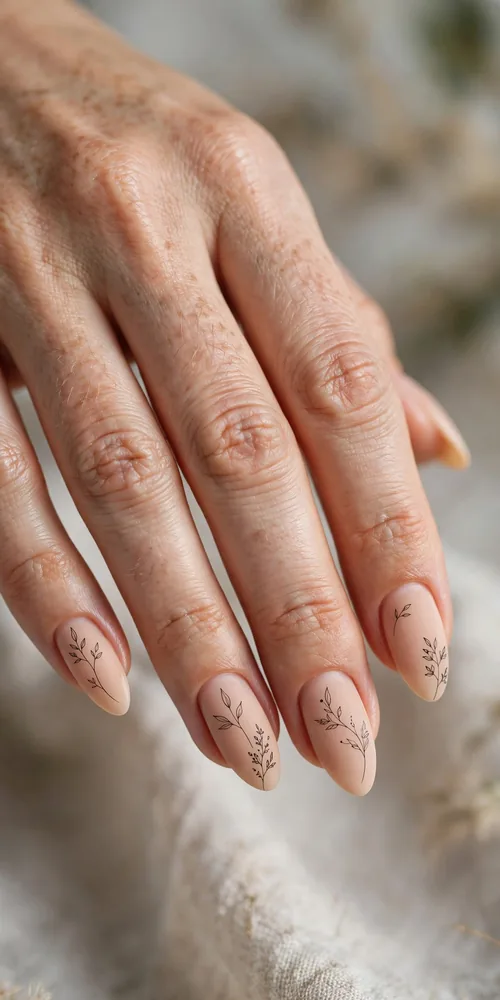
One stem, three or four leaves, nothing else. Load only the tip of a short 5–7mm liner, draw the stem in one upward pull, then press-and-lift for each leaf so ends taper naturally. The fastest full set on this list; it flatters every length. Difficulty: beginner to intermediate.
5. Constellation Lines
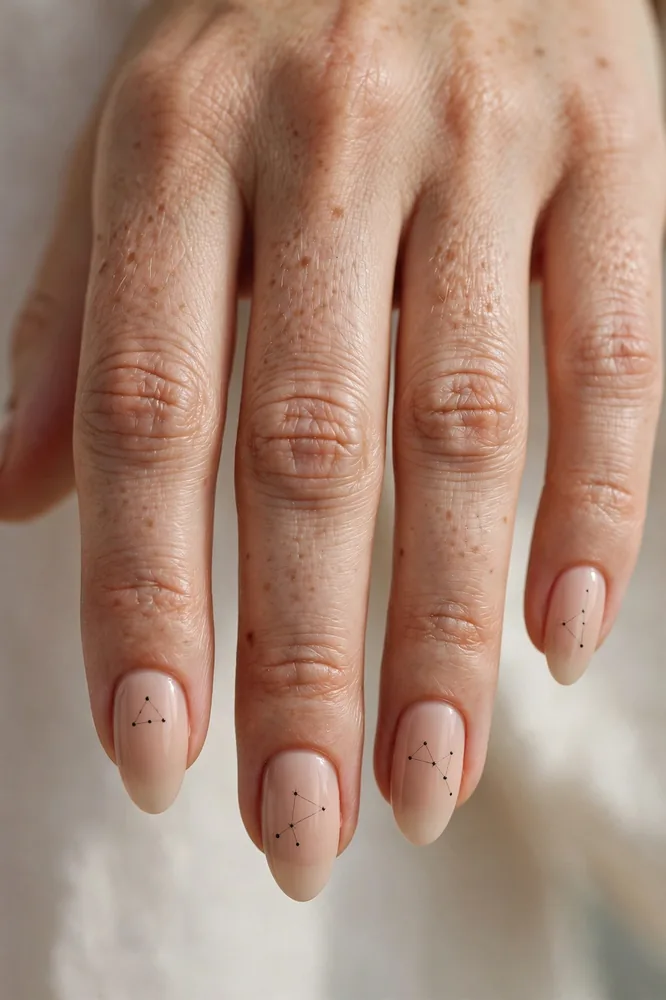
Place your stars first with a dotting tool, then join them with the faintest connecting lines — reversing that order is why home versions look messy. Keep each constellation to one or two accent nails. Difficulty: beginner. Gel liner helps — flash-cure the dots before drawing the joins.
6. Abstract Eye
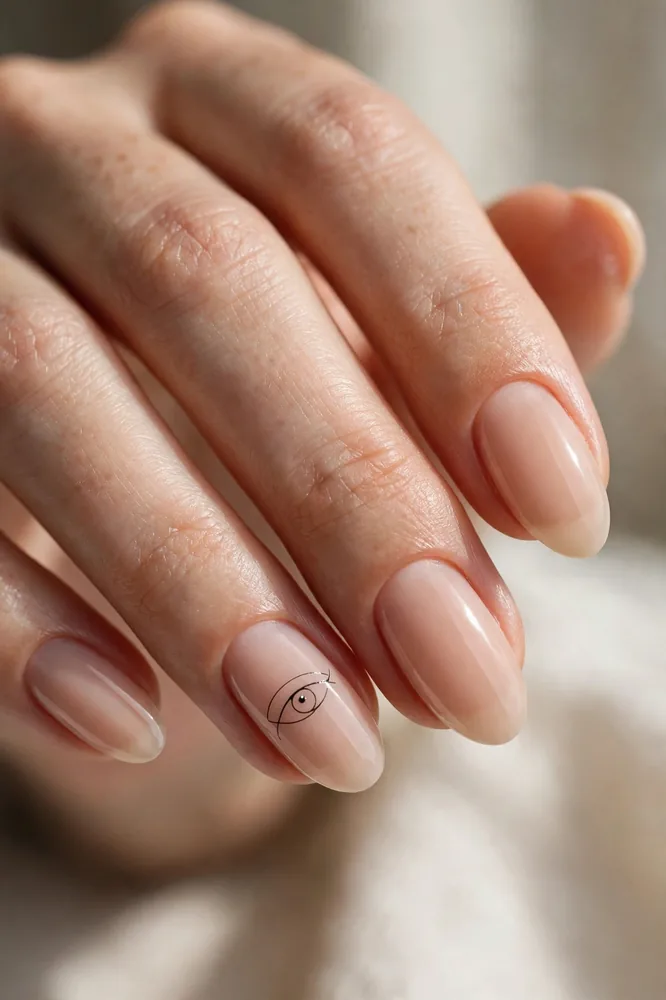
Three strokes only: an almond outline, a short lid line, and two or three lashes. Resist adding a pupil — that detail tips the design from gallery-minimal to novelty. One eye per hand, on the middle or ring finger, balances best. Difficulty: intermediate.
7. Swirl Lines
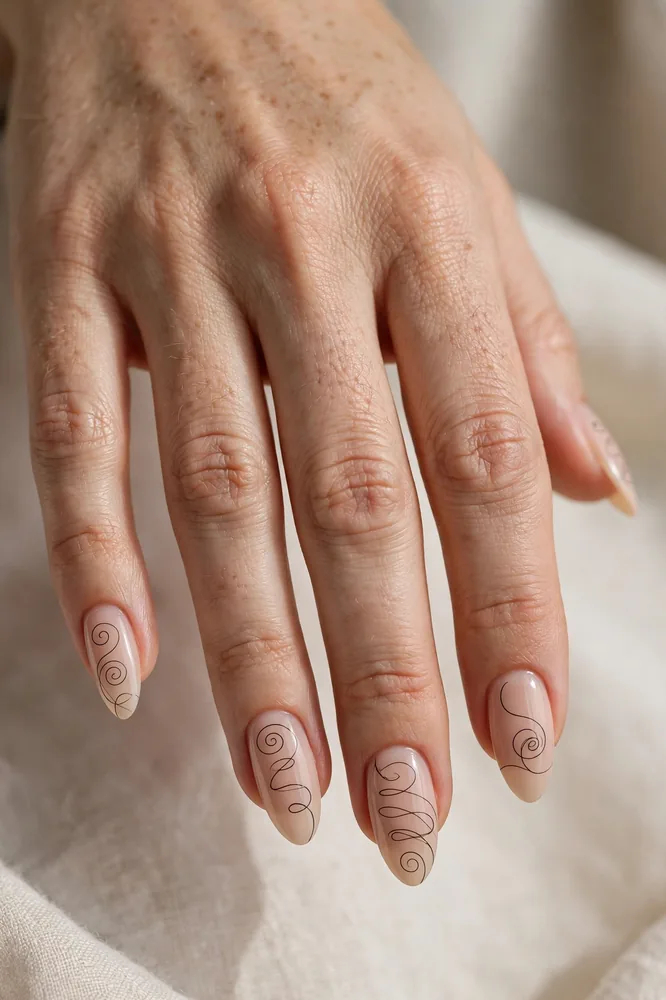
Loose spirals are the most forgiving entry point — there is no straight edge to fail. Keep pressure feather-light and let the sparingly loaded brush travel; flooding the nail creates blobs at the spiral’s centre. Beautiful on medium almond nails, drawn diagonally. Difficulty: beginner.
8. Grid Lines
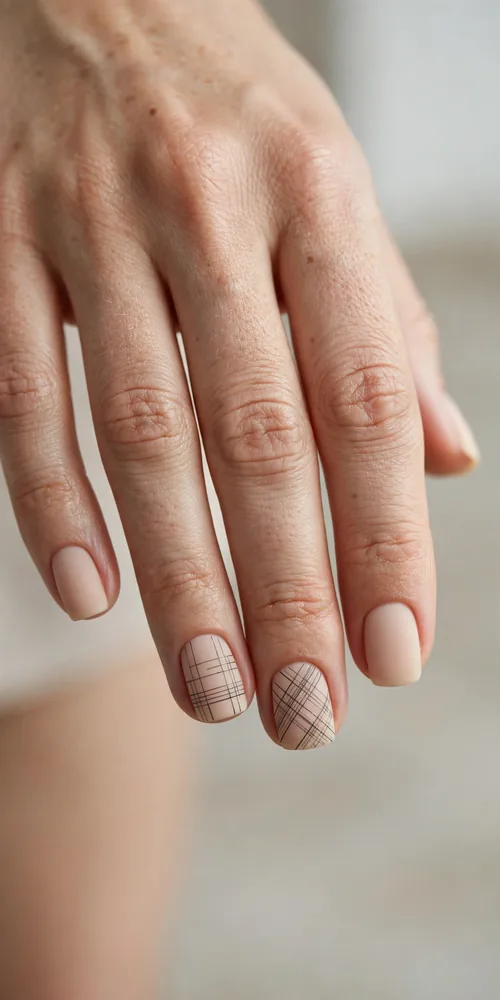
A small crosshatch field, confined to one corner or half of the nail rather than the whole plate. For straight lines, use striping tape as a guide, or pull the liner toward you in short overlapping strokes. Limit it to two accent nails — a full grid set reads busy. Difficulty: intermediate.
9. Half-Moon Outline
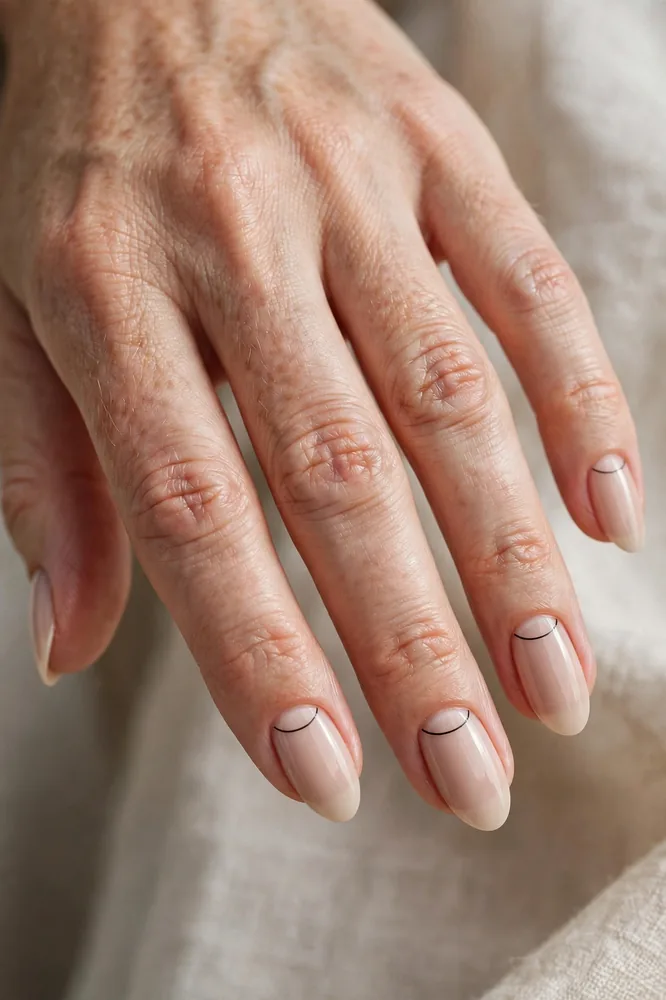
The vintage half-moon, redrawn as an empty outline following the lunula. Because the art sits at the base, far from the free edge, it is the longest-wearing design here — tip chips never touch it. Follow your natural half-moon rather than inventing a semicircle. Suits short round and squoval nails. Difficulty: beginner.
10. Wave Lines
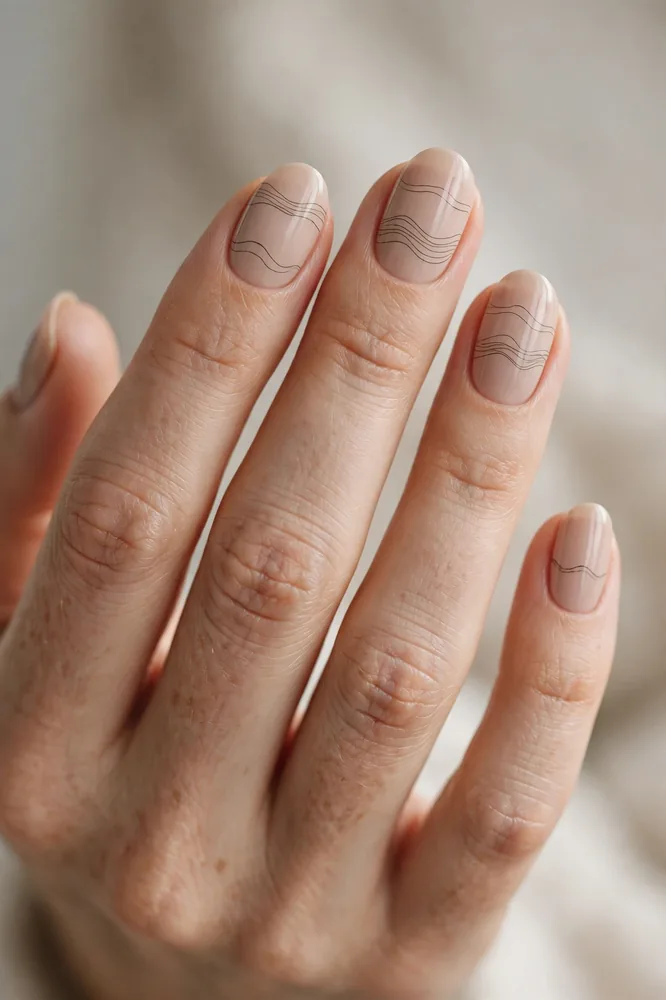
Two or three fine waves travelling across the nail, spaced unevenly on purpose. Move the finger gently side to side under a nearly still brush — a professional trick that produces a far smoother wave than wiggling your hand. Needs travel room, so save it for medium to long oval or almond nails. Difficulty: beginner to intermediate.
11. Diagonal Lines
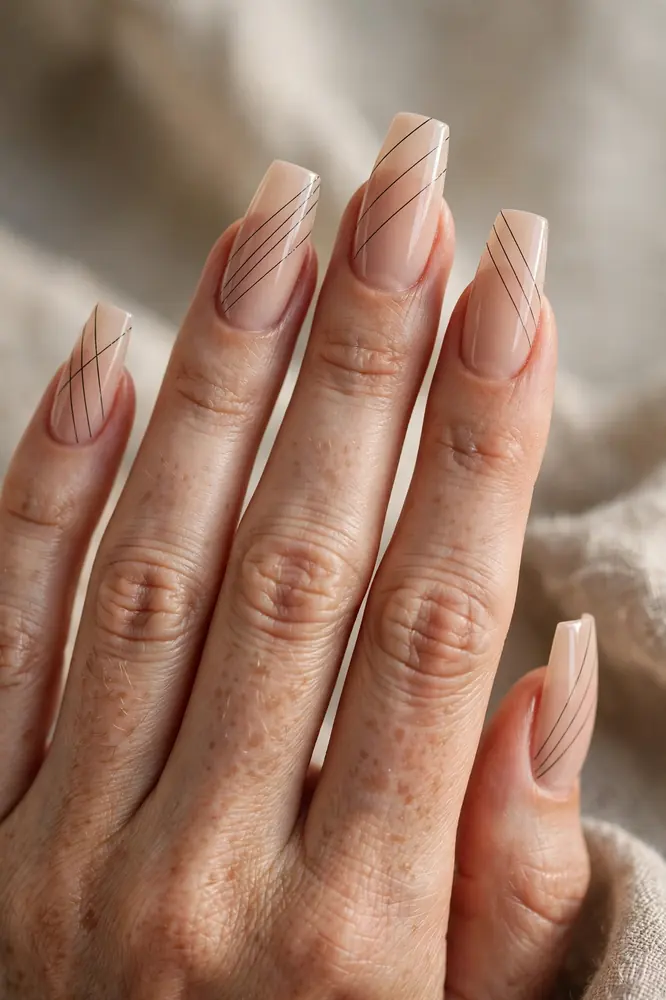
If you attempt only one design, make it this one. Two parallel diagonals, corner to corner, elongate short nails instantly and take under a minute per hand once the base is dry. Vary the angle finger by finger, or keep every diagonal identical for a tailored result. Difficulty: beginner.
12. Single-Line Flower
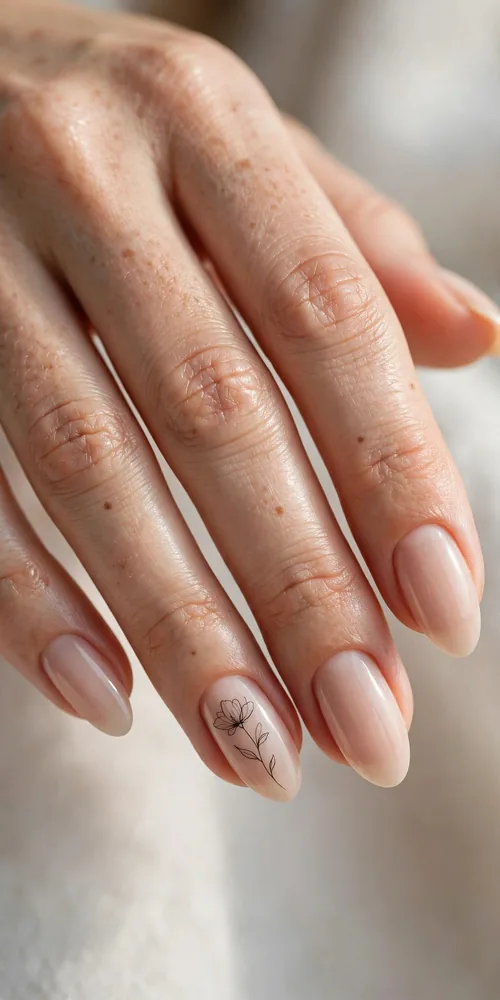
A flower drawn without lifting the brush: loop the petals, pull down into the stem, finish with one leaf flick. Practice the loop on paper first to learn your turning radius — on the nail there is no eraser, only a cleanup brush. One flower per hand is the professional proportion. Difficulty: intermediate.
13. Sun and Moon Outline
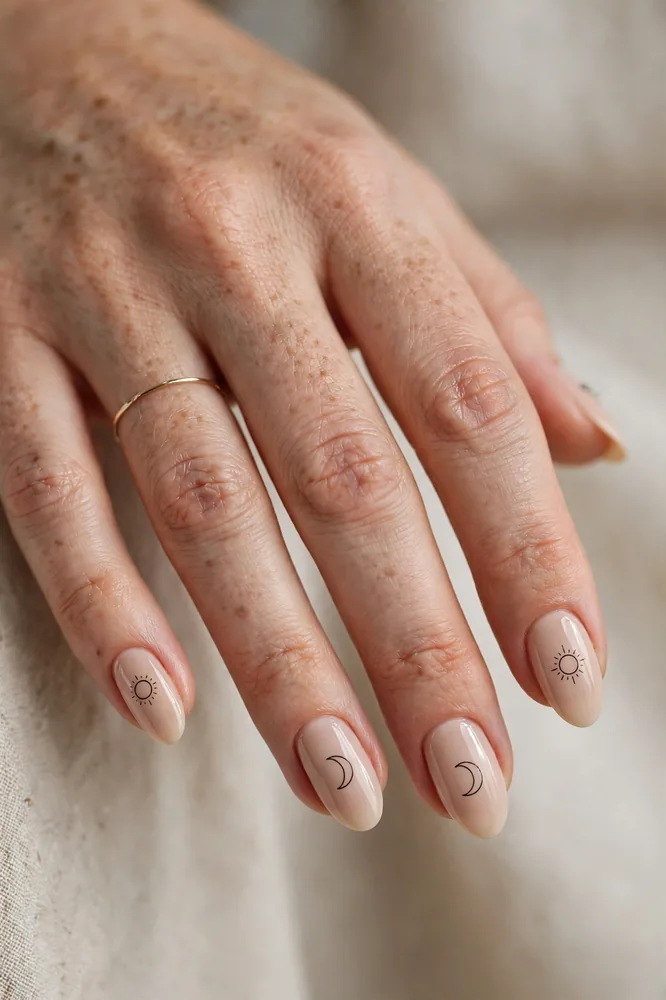
A fine-rayed sun on one hand, a crescent moon on the other — the deliberate asymmetry is what makes clients save this set. Keep the rays short and uneven; perfect rays look stamped. Stamp the sun’s centre with a dotting tool before adding rays. Difficulty: beginner to intermediate.
14. Chevron Lines
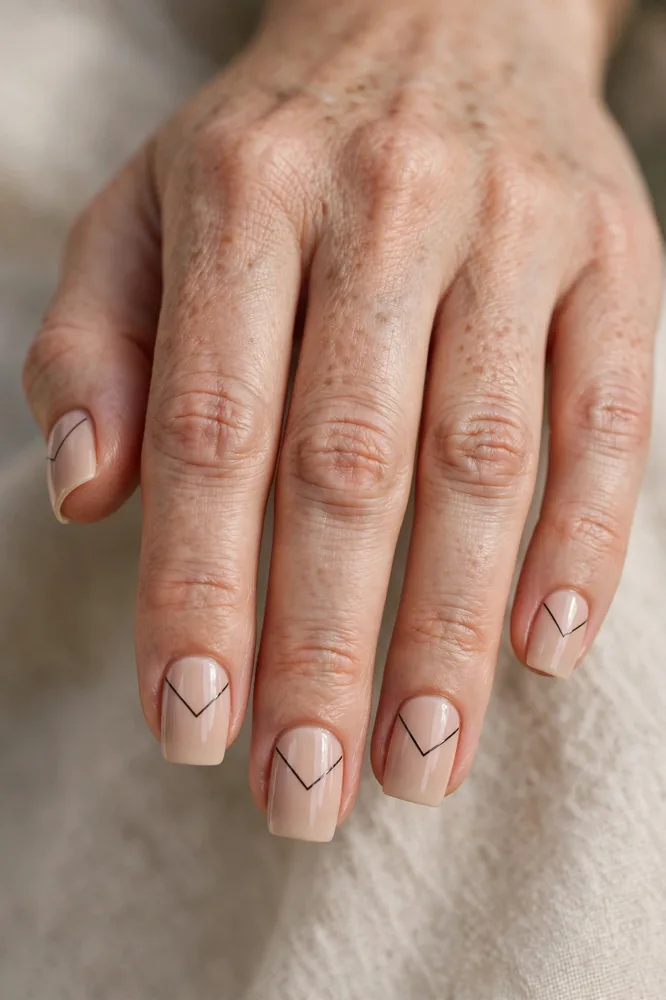
One decisive V per nail. Draw it as two strokes meeting at the point rather than one bent line — the join will be crisper. Point it toward the free edge to lengthen the nail bed, or toward the cuticle on long nails to balance proportions. Works on every shape. Difficulty: beginner.
15. Dot-and-Line
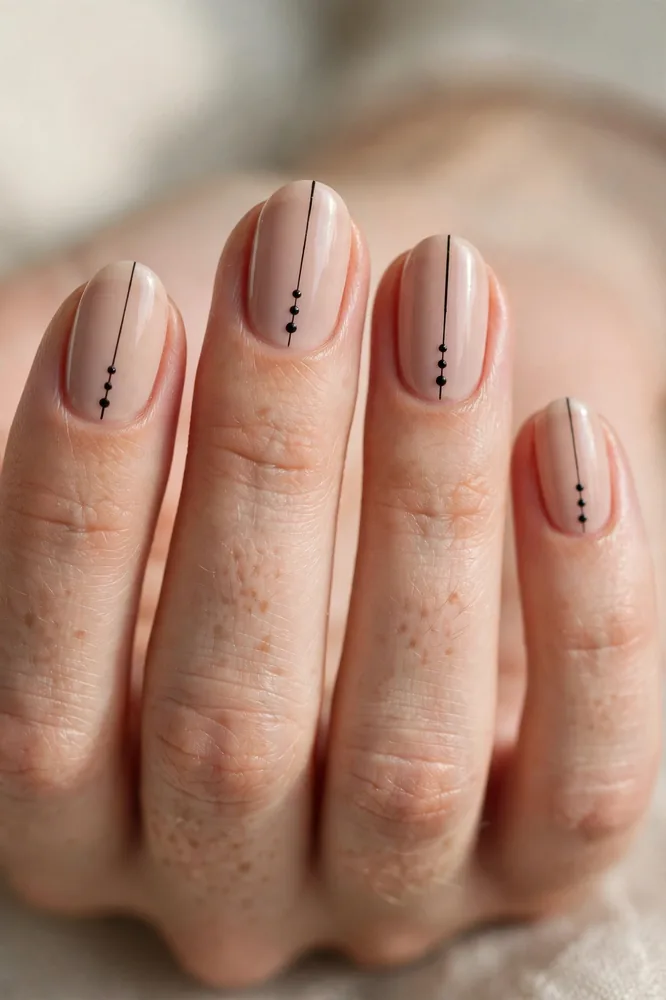
Three dots placed vertically with a dotting tool, then threaded together with a single hairline. Let the dots set for a minute first; dragging a liner through wet dots causes tails and smears. The design I recommend for a non-dominant-hand attempt — almost impossible to place badly. Difficulty: beginner.
16. Border Outline
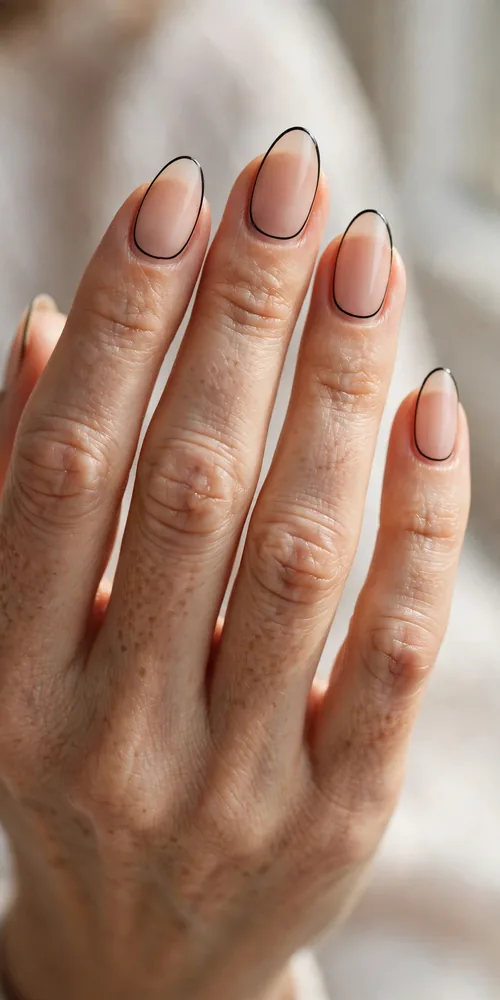
A fine frame traced inside the nail’s perimeter, following sidewalls and free edge. It sharpens any shape like piping on a cushion, and corrects uneven-looking nails. Stay a hair’s width inside the edge so the frame never touches skin, and keep line weight identical on all ten nails. Difficulty: intermediate.
17. Abstract Profile
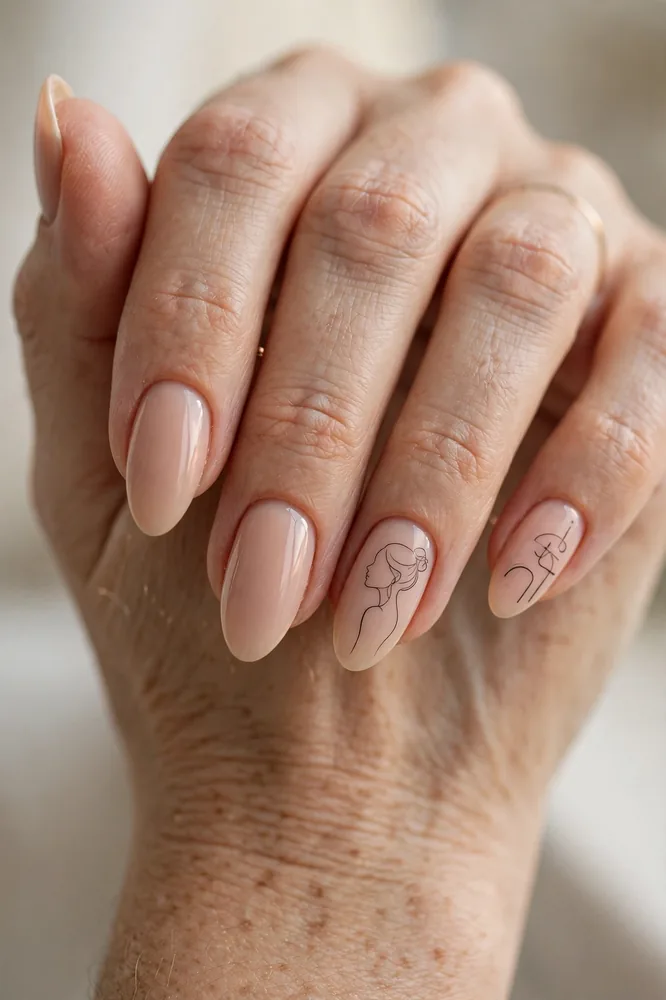
A side profile suggested by one flowing contour — brow, nose, lips, chin — with no interior detail. Choose only one anchor feature beyond the contour, or the small canvas collapses into clutter. Reserve it for your longest, widest nail, in the middle third of the plate, away from the curving sidewalls. Difficulty: advanced.
18. Outline Heart
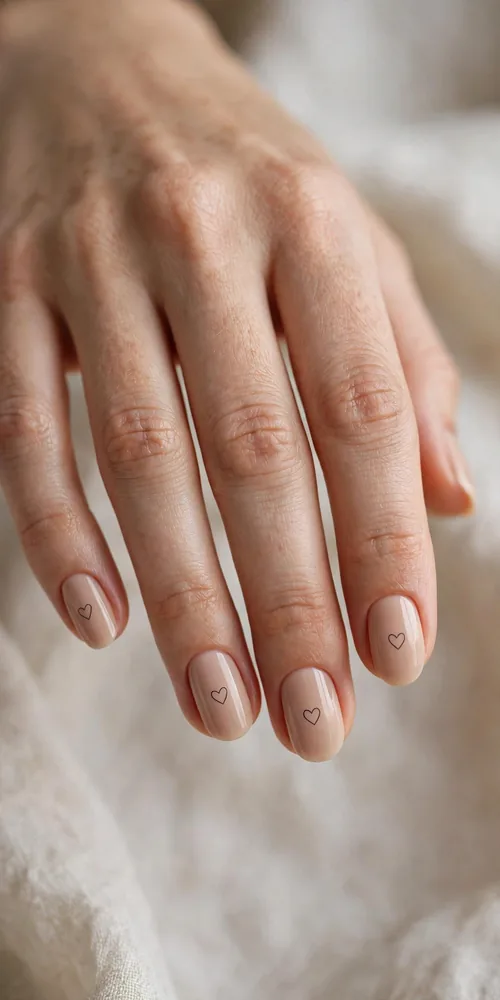
A heart drawn as two mirrored arcs — draw the left arc, then mirror it, rather than attempting one continuous outline. Kept small and slightly off-centre, it reads chic rather than sweet, and works year-round, not just in February. Ideal for short nails. Difficulty: beginner.
19. Cross Lines
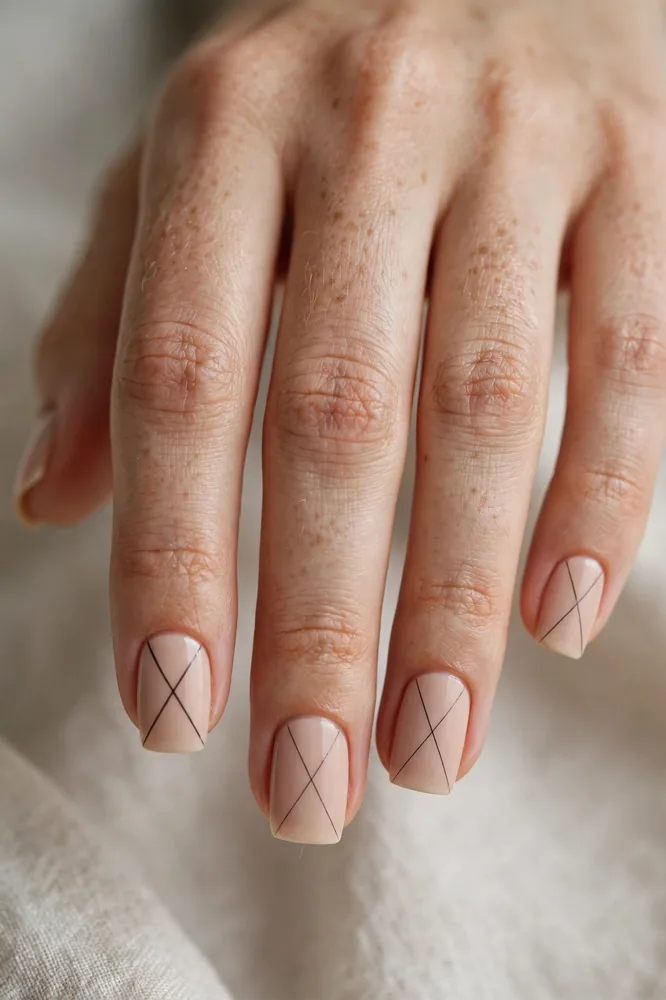
Two intersecting lines forming an off-centre X, all four ends stopping short of the nail edges. That floating gap is deliberate — lines that crash into the sidewalls look accidental. Sit the crossing slightly above centre to elongate the nail bed, and vary the angle across the set rather than copying one X ten times. Difficulty: beginner.
20. Pinstripes
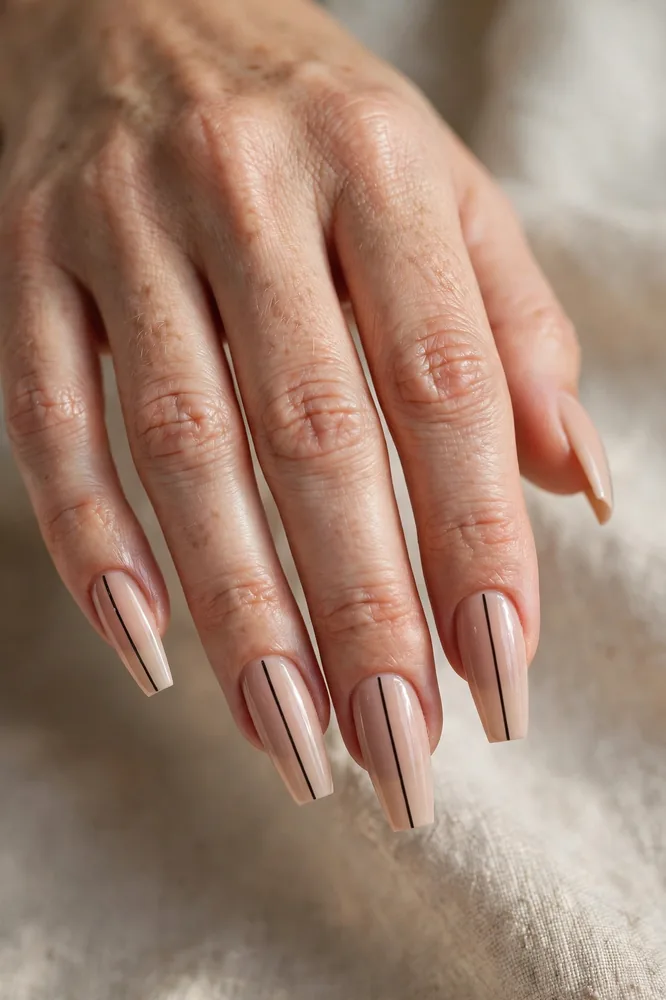
Thin vertical stripes running the full nail length, with genuine negative space between them — three stripes on a medium nail, two on a short one. Pull every stripe from cuticle to tip in one stroke with a long liner; stopping mid-nail leaves a visible join. Vertical lines lengthen the fingers. Difficulty: intermediate.
21. Contour Lines
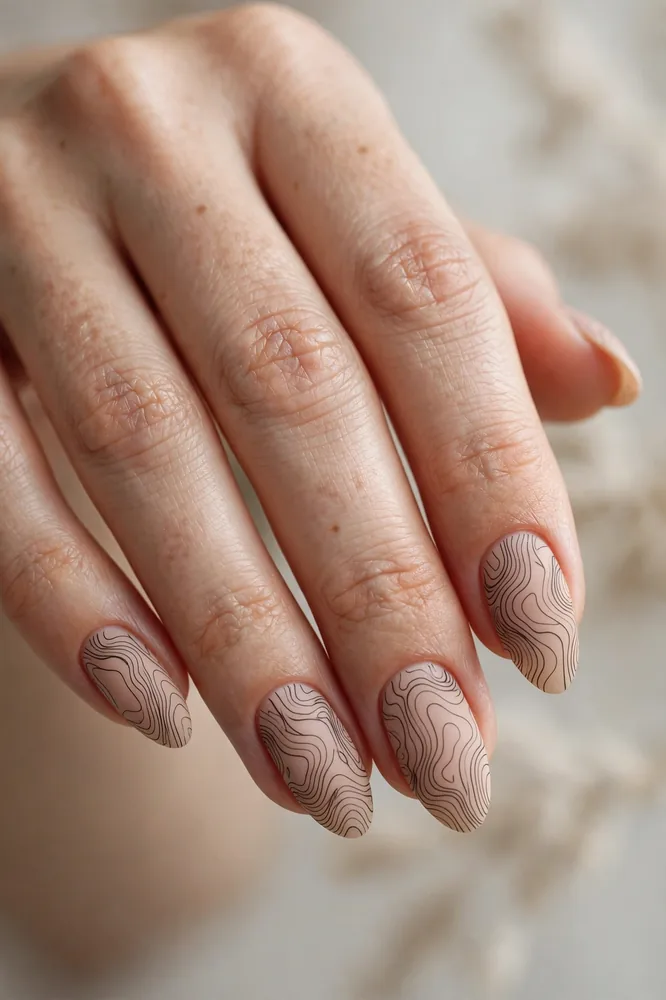
Topographic-map curves echoing each other across the nail, tightening in one corner, opening out in the other. Start with the outermost curve and work inward, keeping spacing roughly even — even spacing, not identical shapes, is what the eye reads as skill. No two nails should match exactly. A favourite on medium almond and oval nails. Difficulty: intermediate.
22. Butterfly Outline
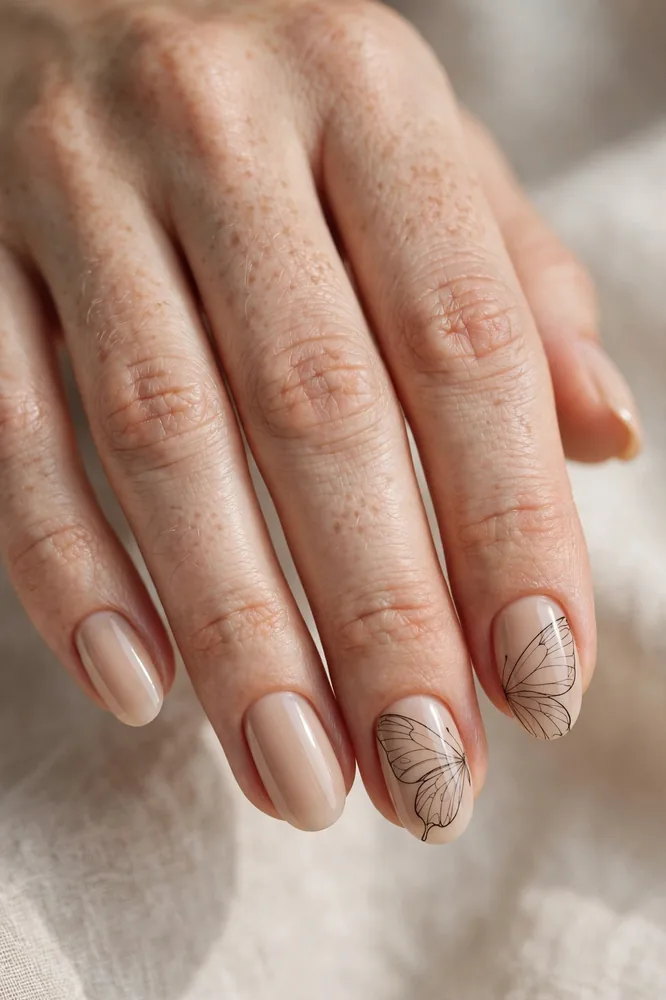
One open wing pair, traced in the finest line you can manage, the body suggested by a short stroke or two tiny dots. Keep at least half the nail empty — a butterfly that fills the plate loses its delicacy. Split the motif across two adjoining nails for an editorial set. Difficulty: intermediate to advanced.
23. Horizon Lines
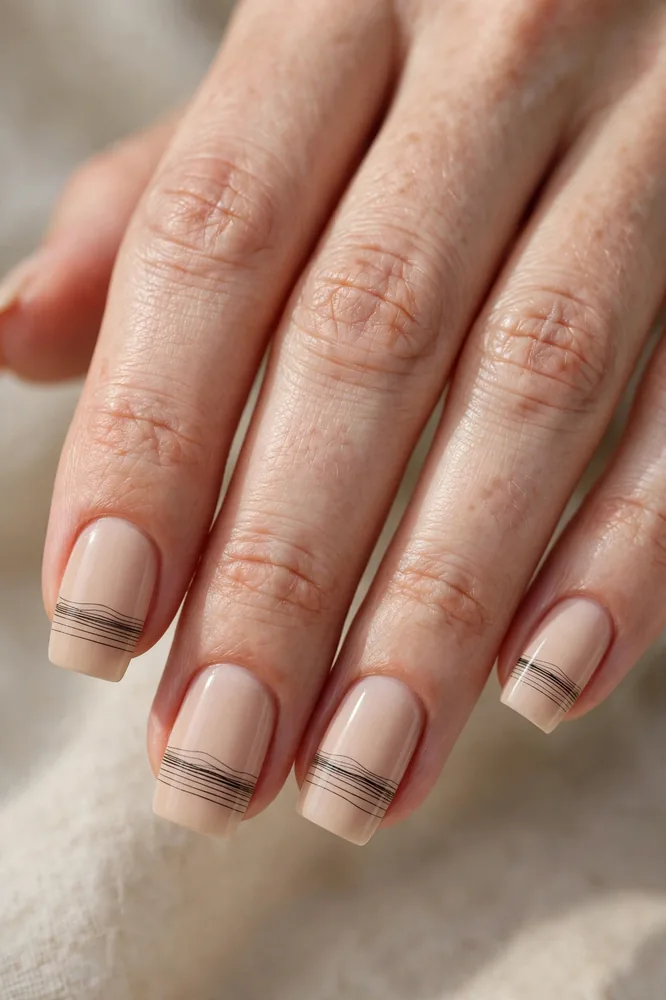
Stacked horizontals of different lengths near the tip, like a landscape reduced to three bands. Horizontal lines widen the nail visually, so choose this for narrow nail beds — avoid it if your nails are short and wide. Keep the lowest line longest, each higher line shorter. Difficulty: beginner.
24. Abstract Hand
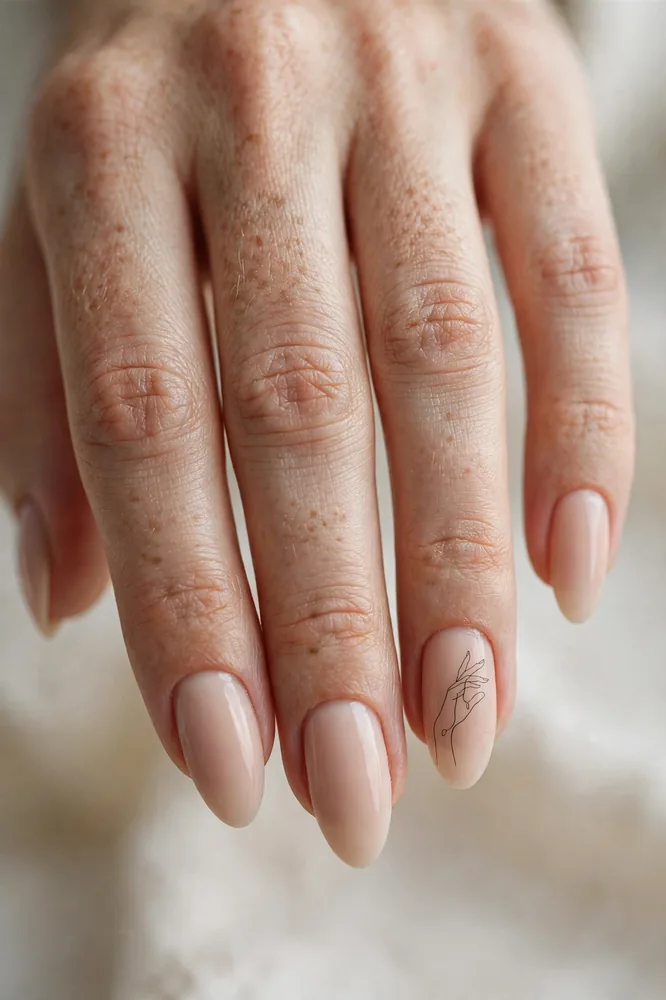
A small reaching hand in continuous line — the most avant-garde motif here, and the one that starts conversations. Simplify ruthlessly: four finger curves and a thumb arc, with no knuckles or jewellery drawn in. Place it alone on an accent nail against an otherwise bare set. Difficulty: advanced; practise on paper at actual size first.
25. Mid-Century Lines
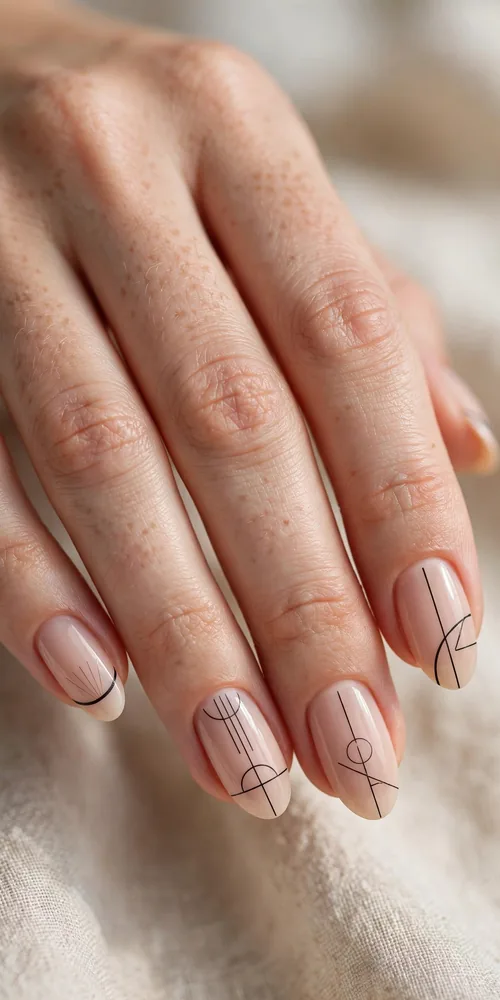
Circles, half-circles and straight stems arranged like a 1950s mobile — one shape per nail, balanced as a set rather than repeated. Stamp solid dots with a dotting tool and reserve the liner for outlines and stems to keep the geometry clean. Strictly black on nude is classic; deep espresso softens it. Difficulty: intermediate.
More Nail Ideas You’ll Love
- 25 Minimalist Nail Art Ideas for 2026 (Clean, Chic & Easy)
- 25 Reverse French Nails: Half-Moon & Cuticle Cuff Ideas for Every Occasion
- 25 Double French Tip Nails for Maximum Manicure Impact
Line Art Nail FAQs
What base color works best for line art nails?
A sheer nude, milky white or pale blush close to your skin tone. Fine lines need optical contrast, and a near-invisible base maximises the negative space the style depends on. Jet-black or deep espresso linework shows best on light bases; on a dark base, switch to white or cream. Avoid glitter or shimmer bases, which break up the line.
What brush should I use for line art nails?
A dedicated liner brush. Start with a short liner, around 5–9mm, for dots, hearts and short strokes; move to a 10–15mm long liner for French outlines, pinstripes and long pulls — longer bristles lay a smoother continuous line. Load only the tip, and dedicate separate brushes to gel and regular polish.
My lines keep coming out wobbly — how do I fix that?
Wobble is almost always too much product or pressure, not a lack of talent. Wipe the brush nearly dry, use feather-light pressure, anchor your pinky on the table, and pull the stroke toward you in one smooth movement. Practise the motif on paper at nail size first. Gel liner adds a safety net: wipe off and redraw freely before curing.
Are line art nails suitable for short nails?
Yes — one of the best art choices for short nails, provided the motif is scaled down. Choose single-feature designs: diagonals, dot-and-line, outline hearts, half-moon outlines and fine-line French all sit comfortably on a short plate. Save faces and profiles for your longest nail as an accent, and keep detail in the middle third, away from the curving sidewalls.
How long do line art nails last?
With regular polish, expect 3–7 days, up to 5–10 with meticulous prep, thin coats and good top coat. In gel liner over a gel base, the same designs wear 2–3 weeks. Cap the free edge when you seal, reapply top coat every 2–3 days on a polish set, wear gloves for washing up, and use cuticle oil daily.
Final Thoughts
From a professional’s chair, line art nails succeed or fail on three things: a flawless nude base, a motif scaled to the nail carrying it, and stopping one stroke early. Choose the design that matches your length and confidence today — a perfect diagonal always looks more expensive than a crowded face.